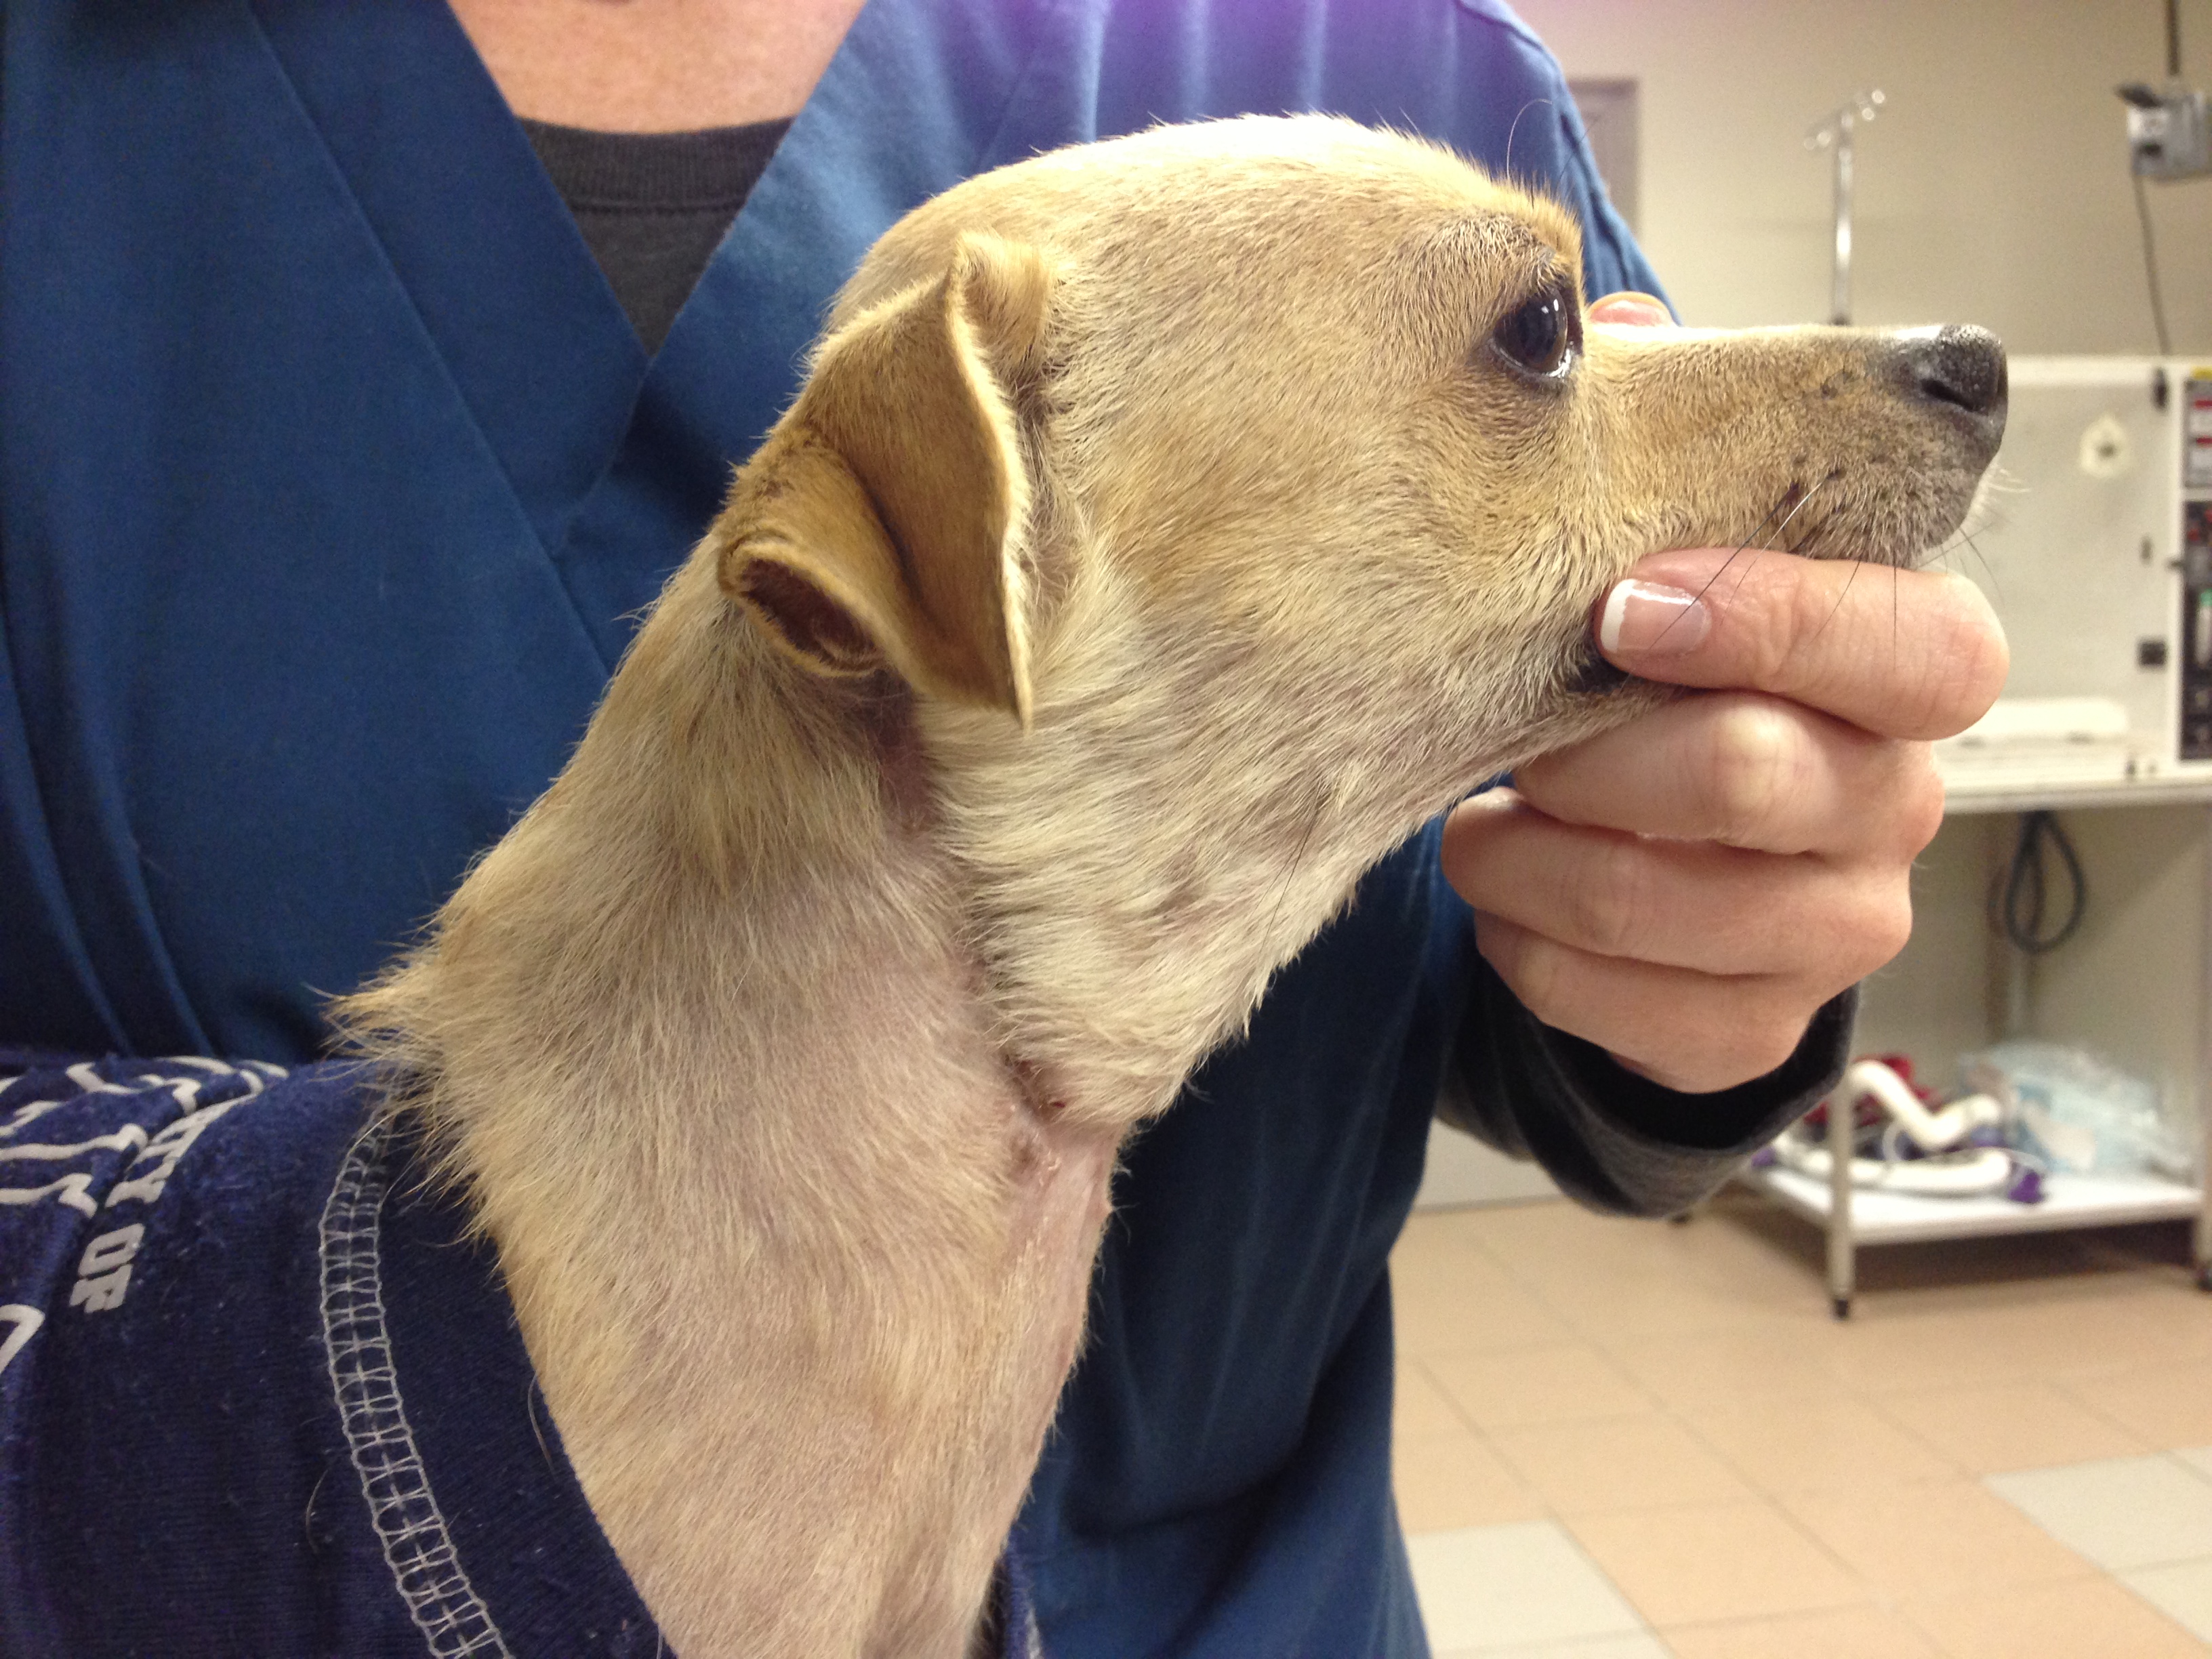
October’s case of the month is an interesting one. Lucky is a young chihuahua mix that came to us with SEVERE injuries. He was attacked by a neighborhood dog about 7 days before presenting to us and was in very bad shape. His initial wounds were managed, but unfortunately infection still set in and the majority of his cervical (neck) skin started to die and needed to be removed. Not only was the infection causing a problem locally, but we had signs of it being spread systemically (through his blood stream). He needed both surgical care and care by a criticalist(board certified in Emergency and Critical Care) in order for him to have a fighting chance. Below is a picture of what he looked like when he was admitted into the hospital.
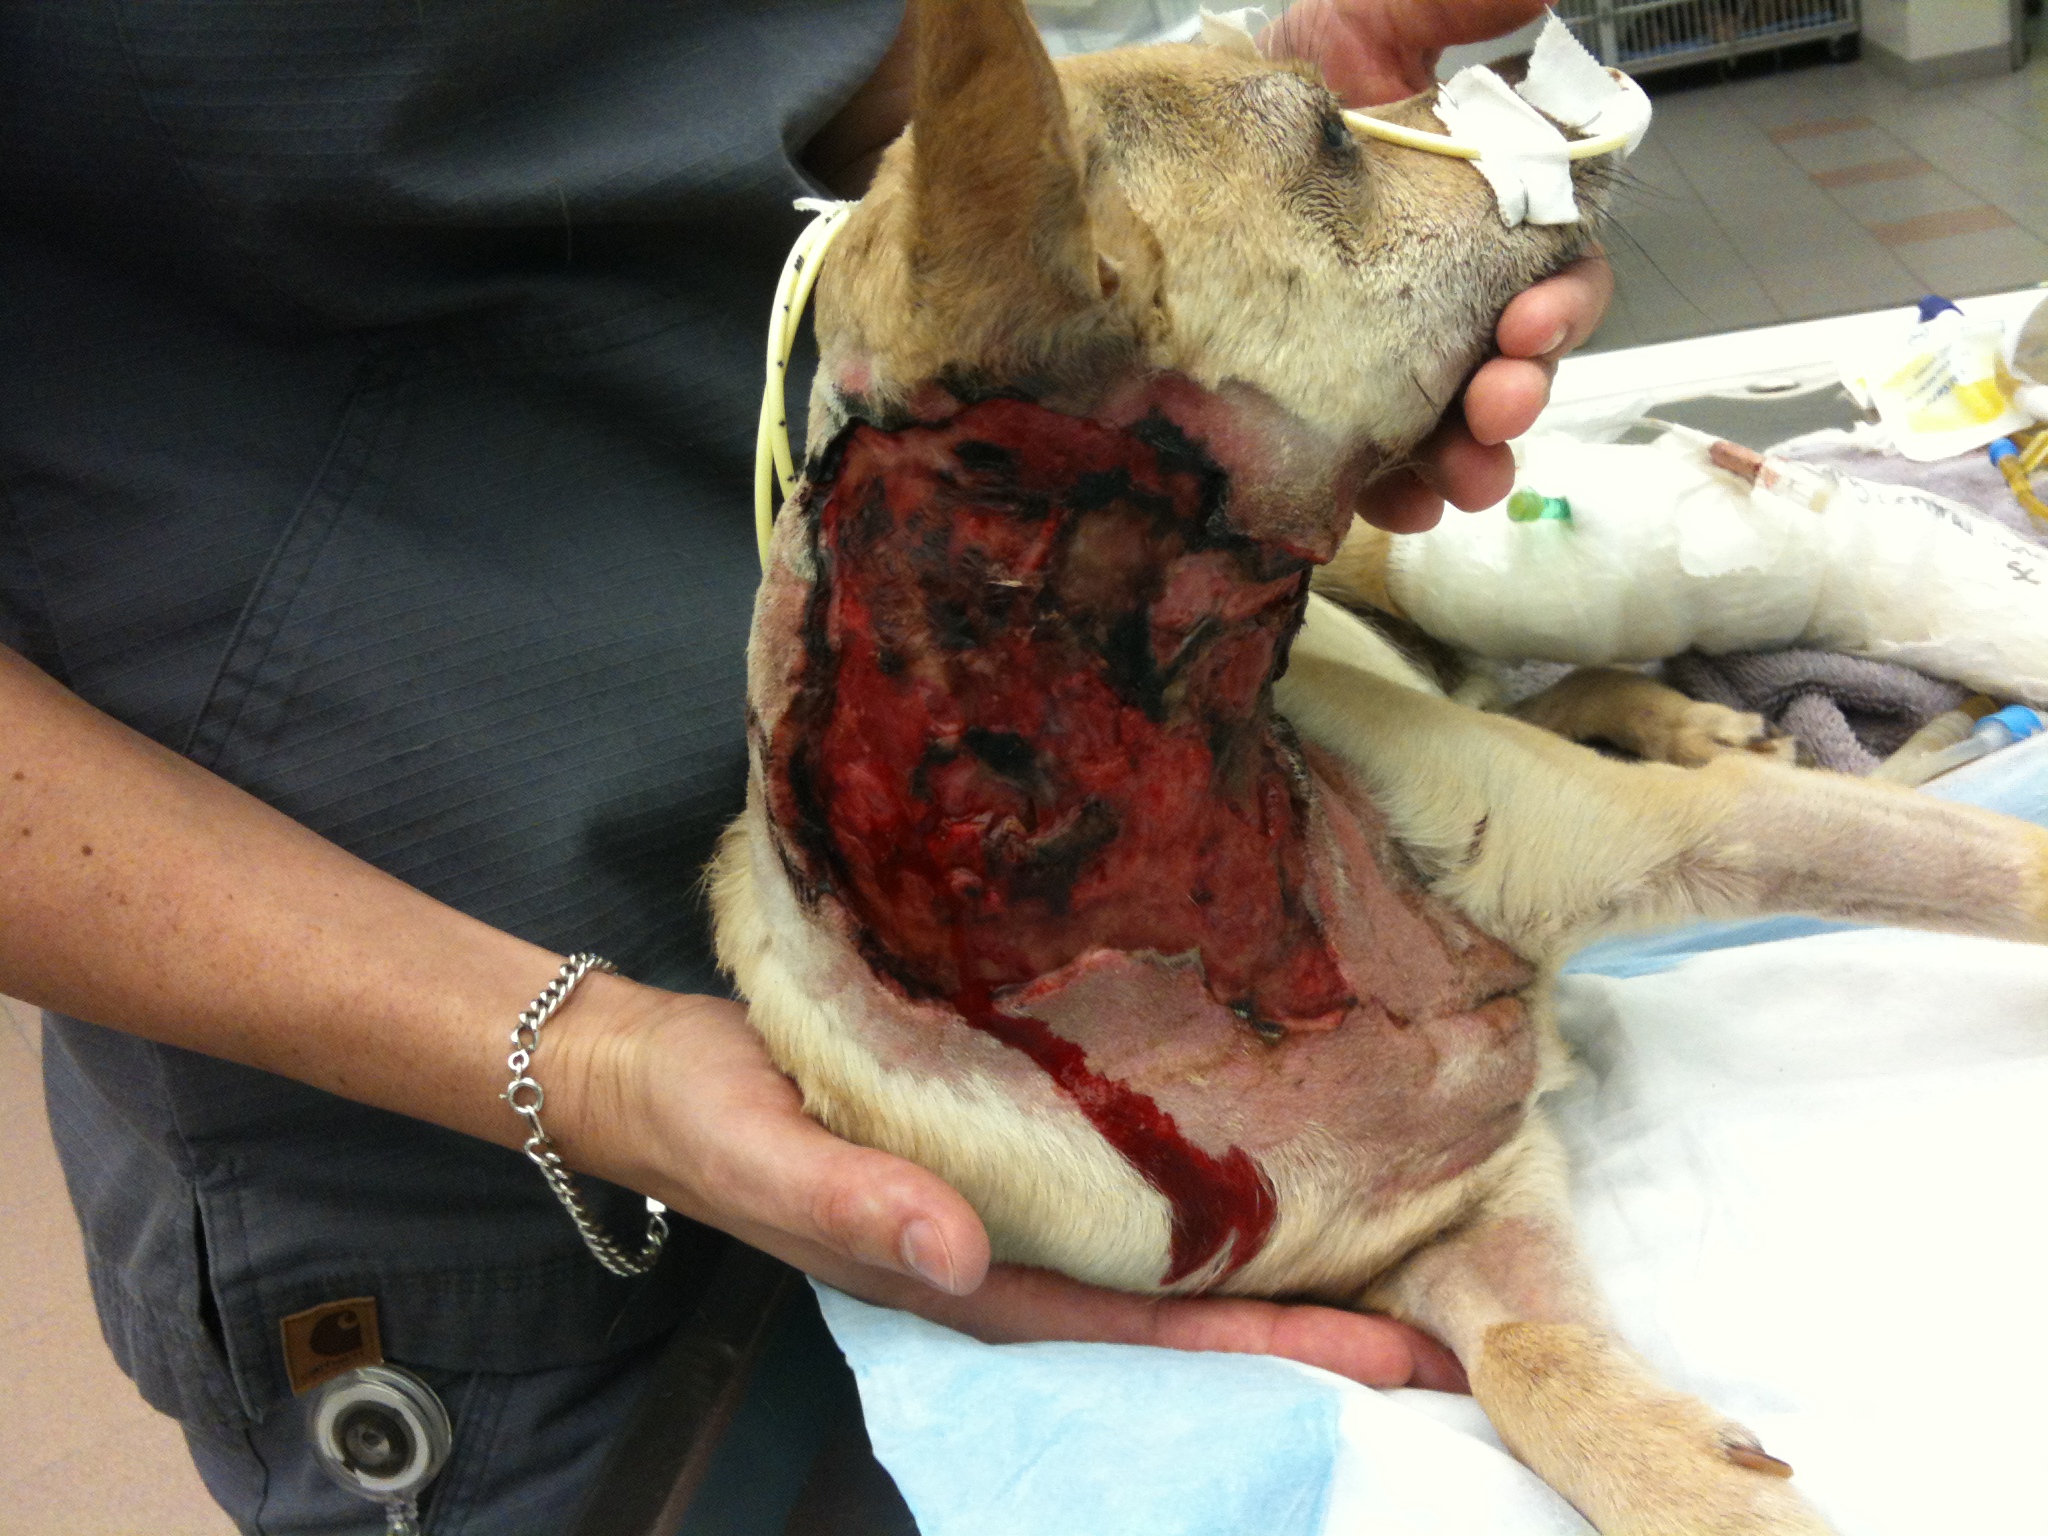
This was Lucky as he was admitted to the hospital.
You can make out the extensive injuries on the photo above. He was fortunate to be alive! Whenever we get a case like this (unfortunately it happens more frequently than we like), we am always realistic with the owners, because there is a chance that their pet will not survive. Also, these cases are not quick cases, Lucky was hospitalized for 2-3 weeks and wasn’t fully healed for about 6 weeks. Our first objective is to get the systemic infection under control and get him strong enough to be able to handle surgery. While the criticalist was working on the systemic infection, we were concentrating on the neck wound.
The first phase wounds go through is the debridement phase, which is where the body gets rid of necrotic (dead) tissue and the size of the wound is established. The next phase to follow is the granulation phase. The granulation phase is very important in a large wound like this, this is when the body begins to infiltrate the wound with healthy tissue and more importantly capillary vessels, which bring blood flow. For this wound, I choose to use a wound dressing called BurnStat (Ubuntu) which is a dressing that can be used through multiple phases. It is an organic clay substrate that does an excellent job of removing toxins and necrotic tissue while promoting granulation tissue formation.
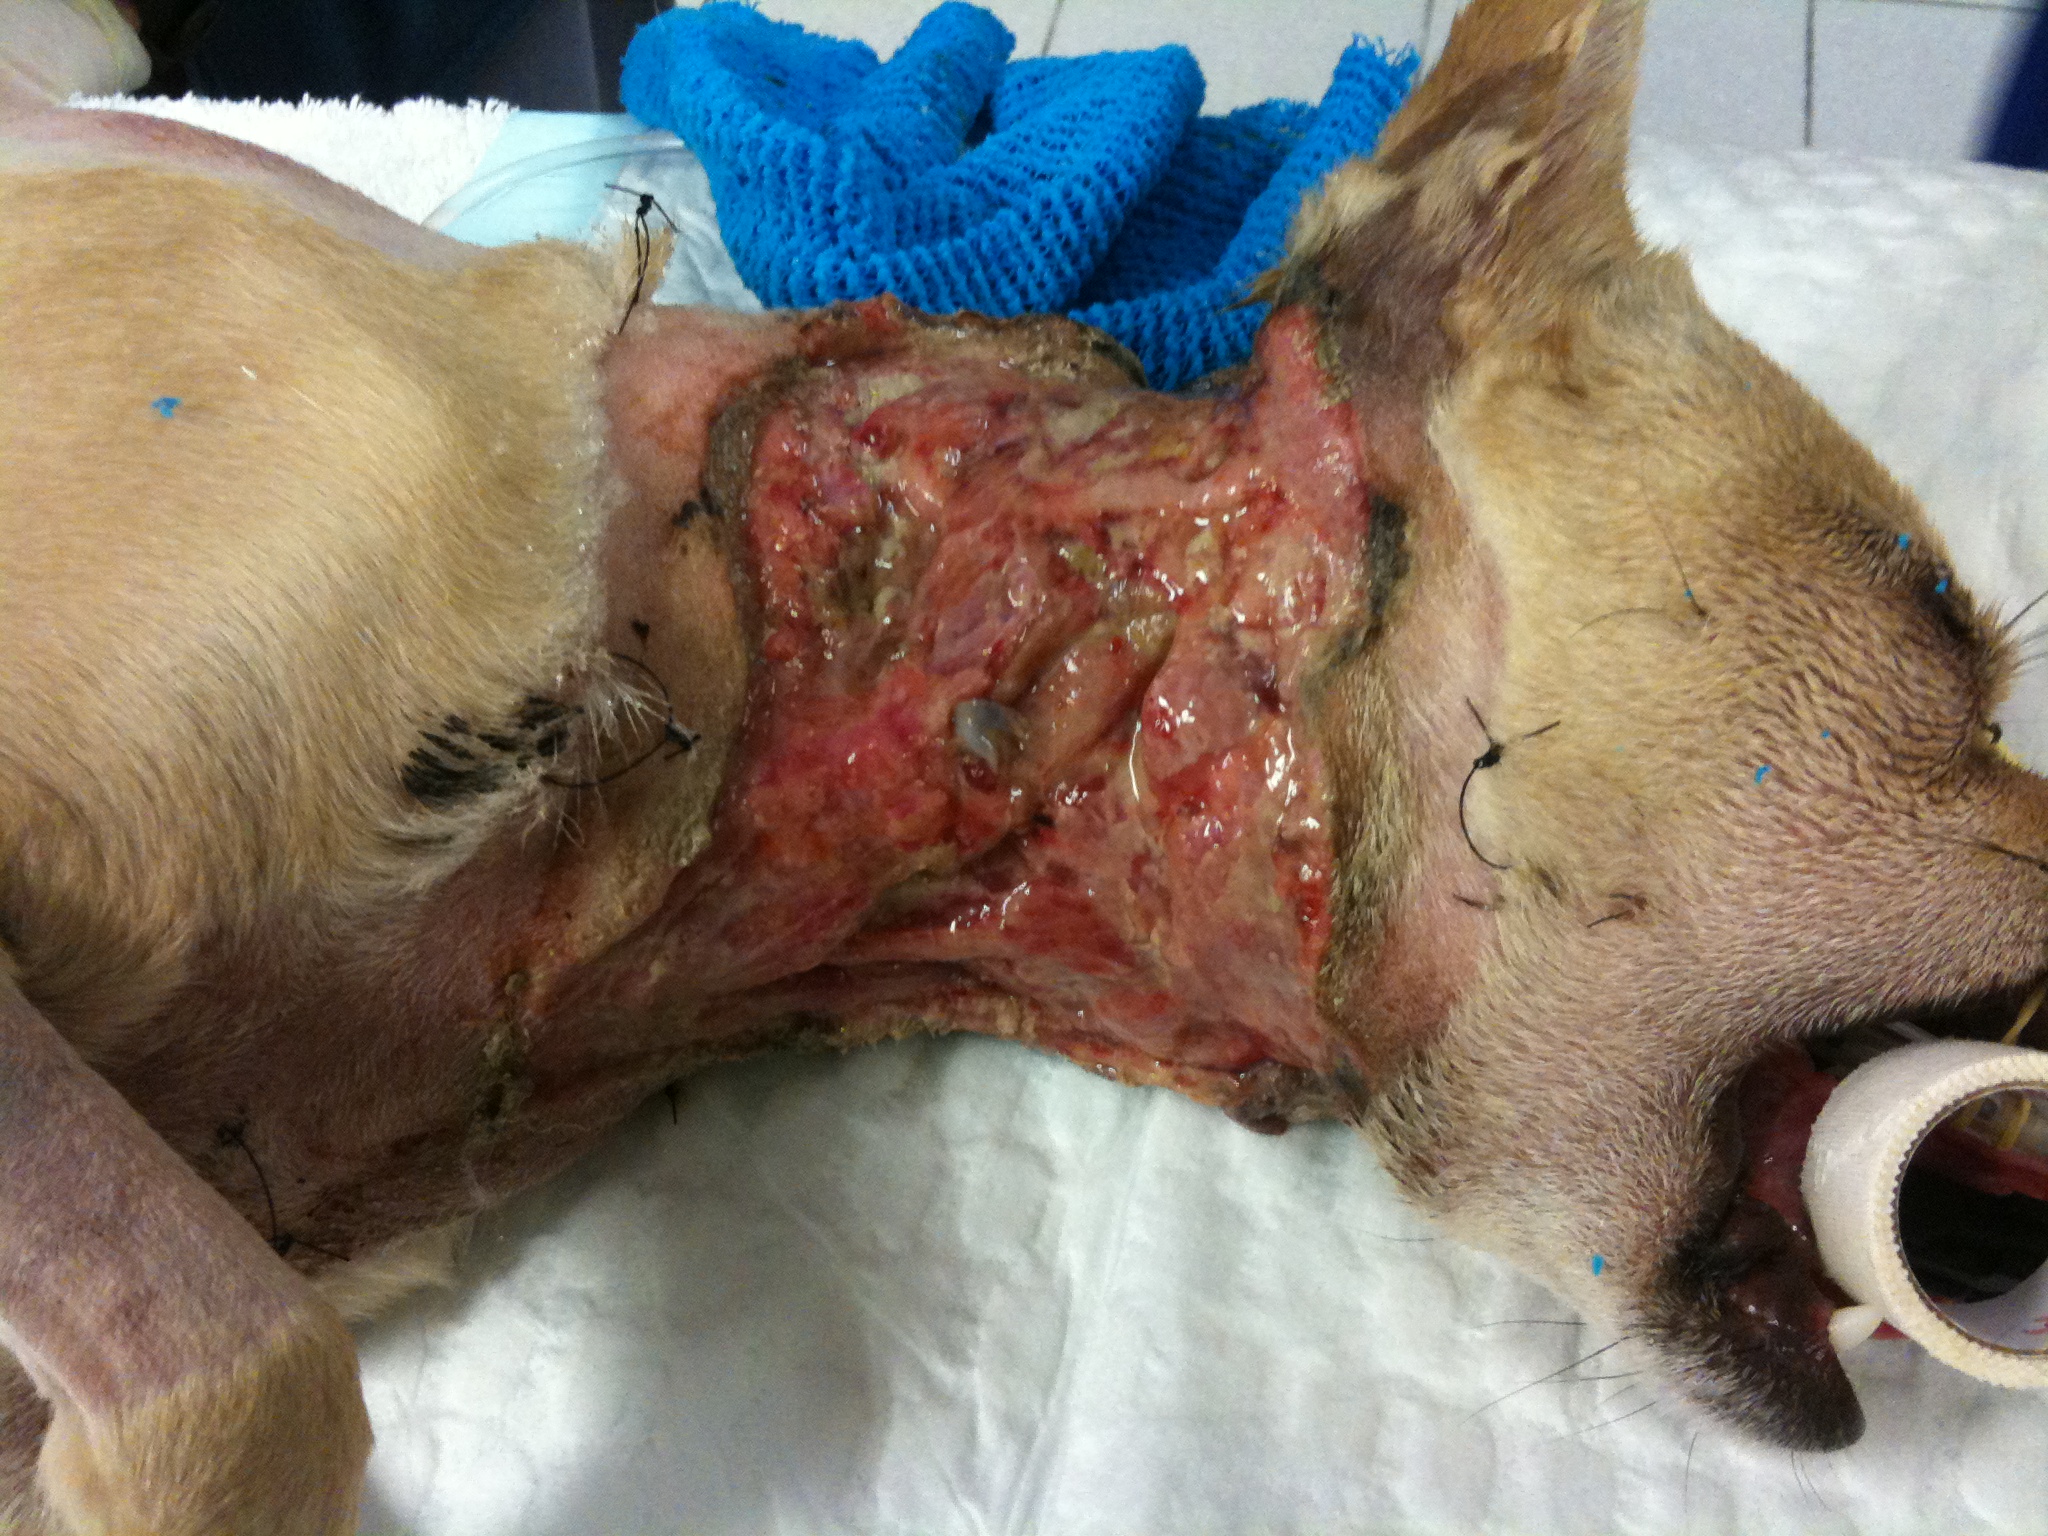
Debridement phase
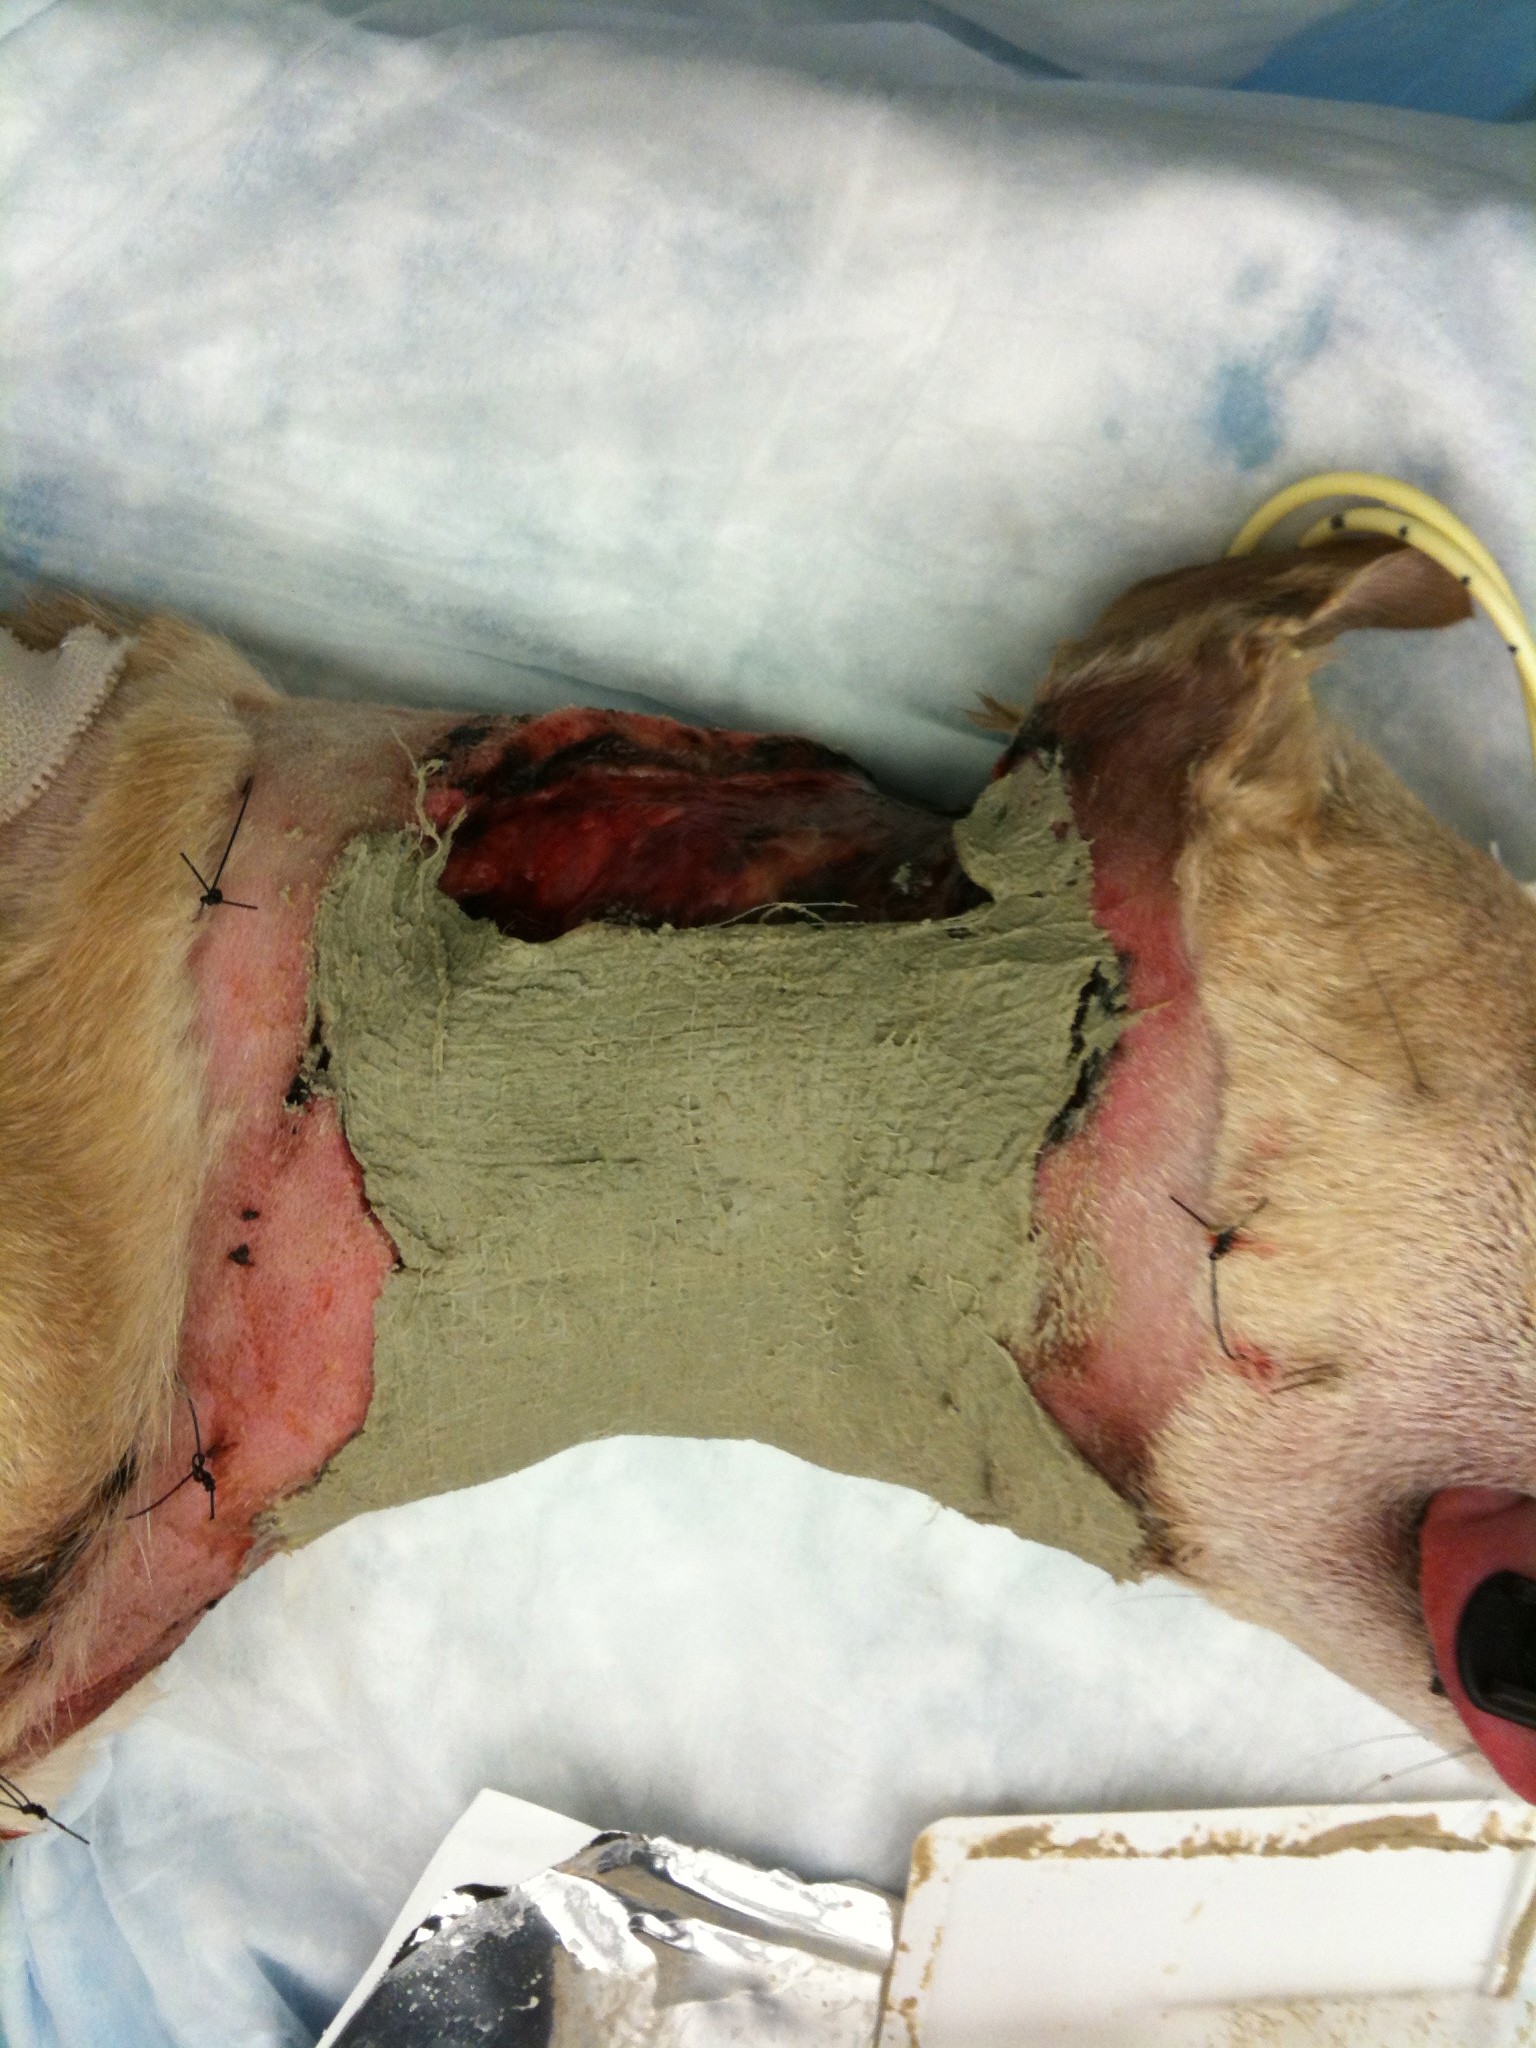
Applying BurnStat as the primary wound dressing
Following this type of bandaging, the diseased tissue begins to be replaced with more healthy, red granulation tissue. The final product, before being able to close the wound, needs to be completely covered with granulation tissue in order to increase the chance of the new skin being accepted.
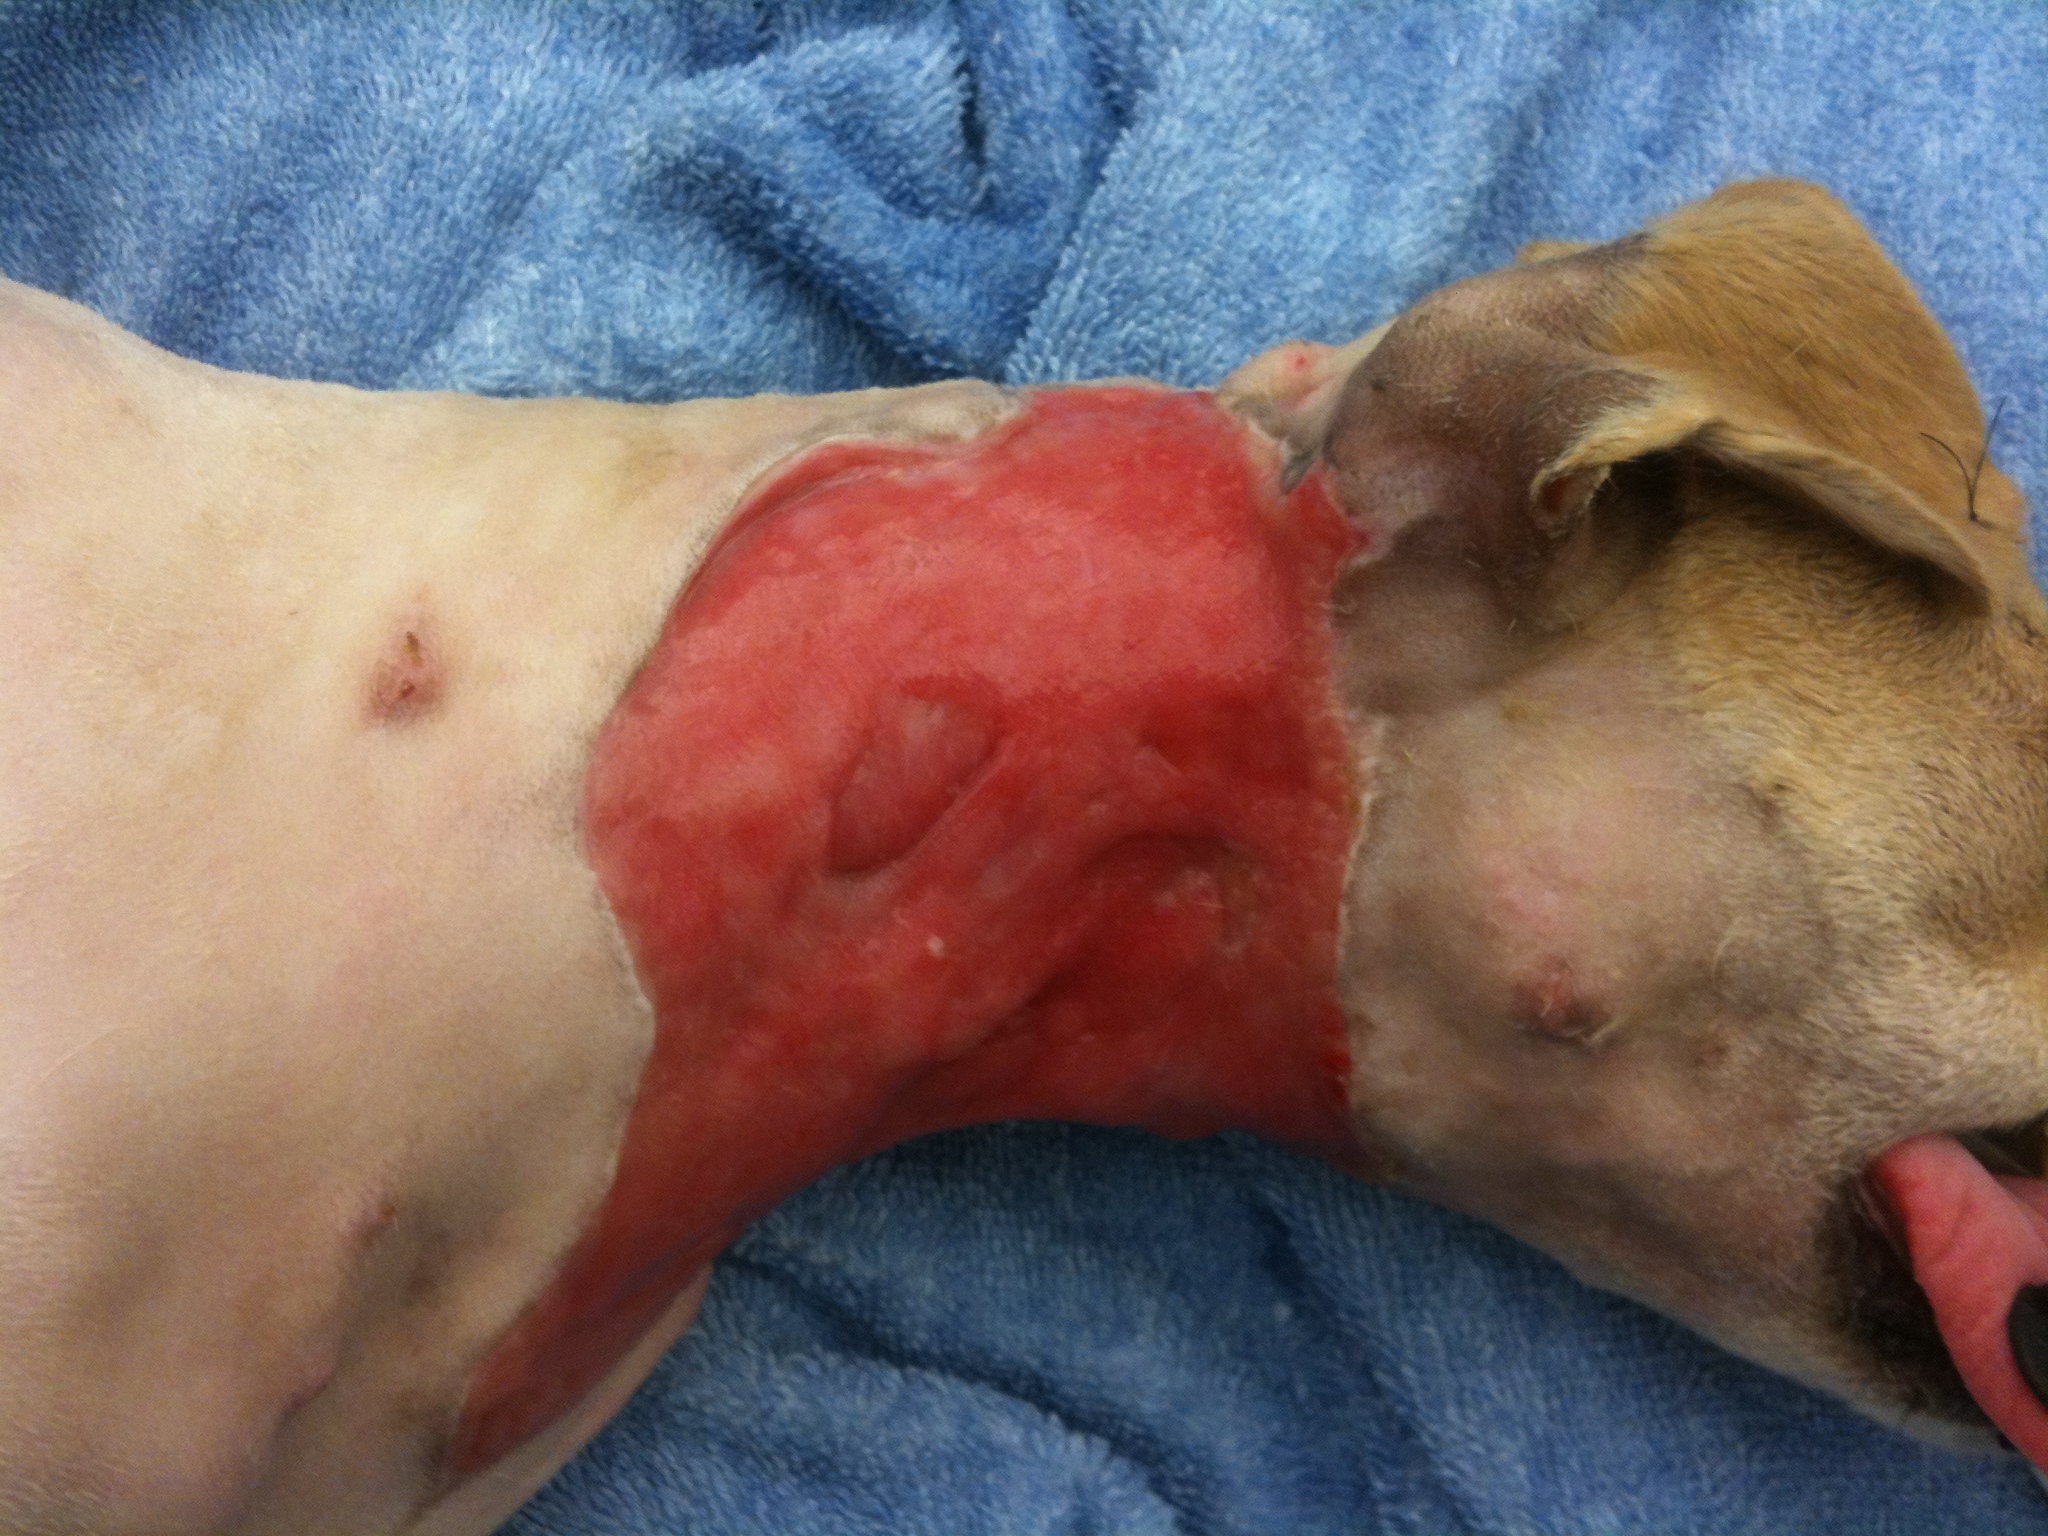
Complete coverage by granulation tissue.
You can see how the surface is covered with healthy looking tissue and no presence of dying tissue visible. By this time Lucky amazingly over came his battle with the widespread infection and overall was doing very well. He was making a remarkable recovery.
Our next dilemma was “how do we cover the exposed tissue”? In cases like this, we have a few options, which is beyond the scope of this post. I choose to use an advancement flap (skin freed up from a nearby location that is moved over the wound), which made the most sense due to the elasticity of the skin in this area. Below is his wound following surgery.
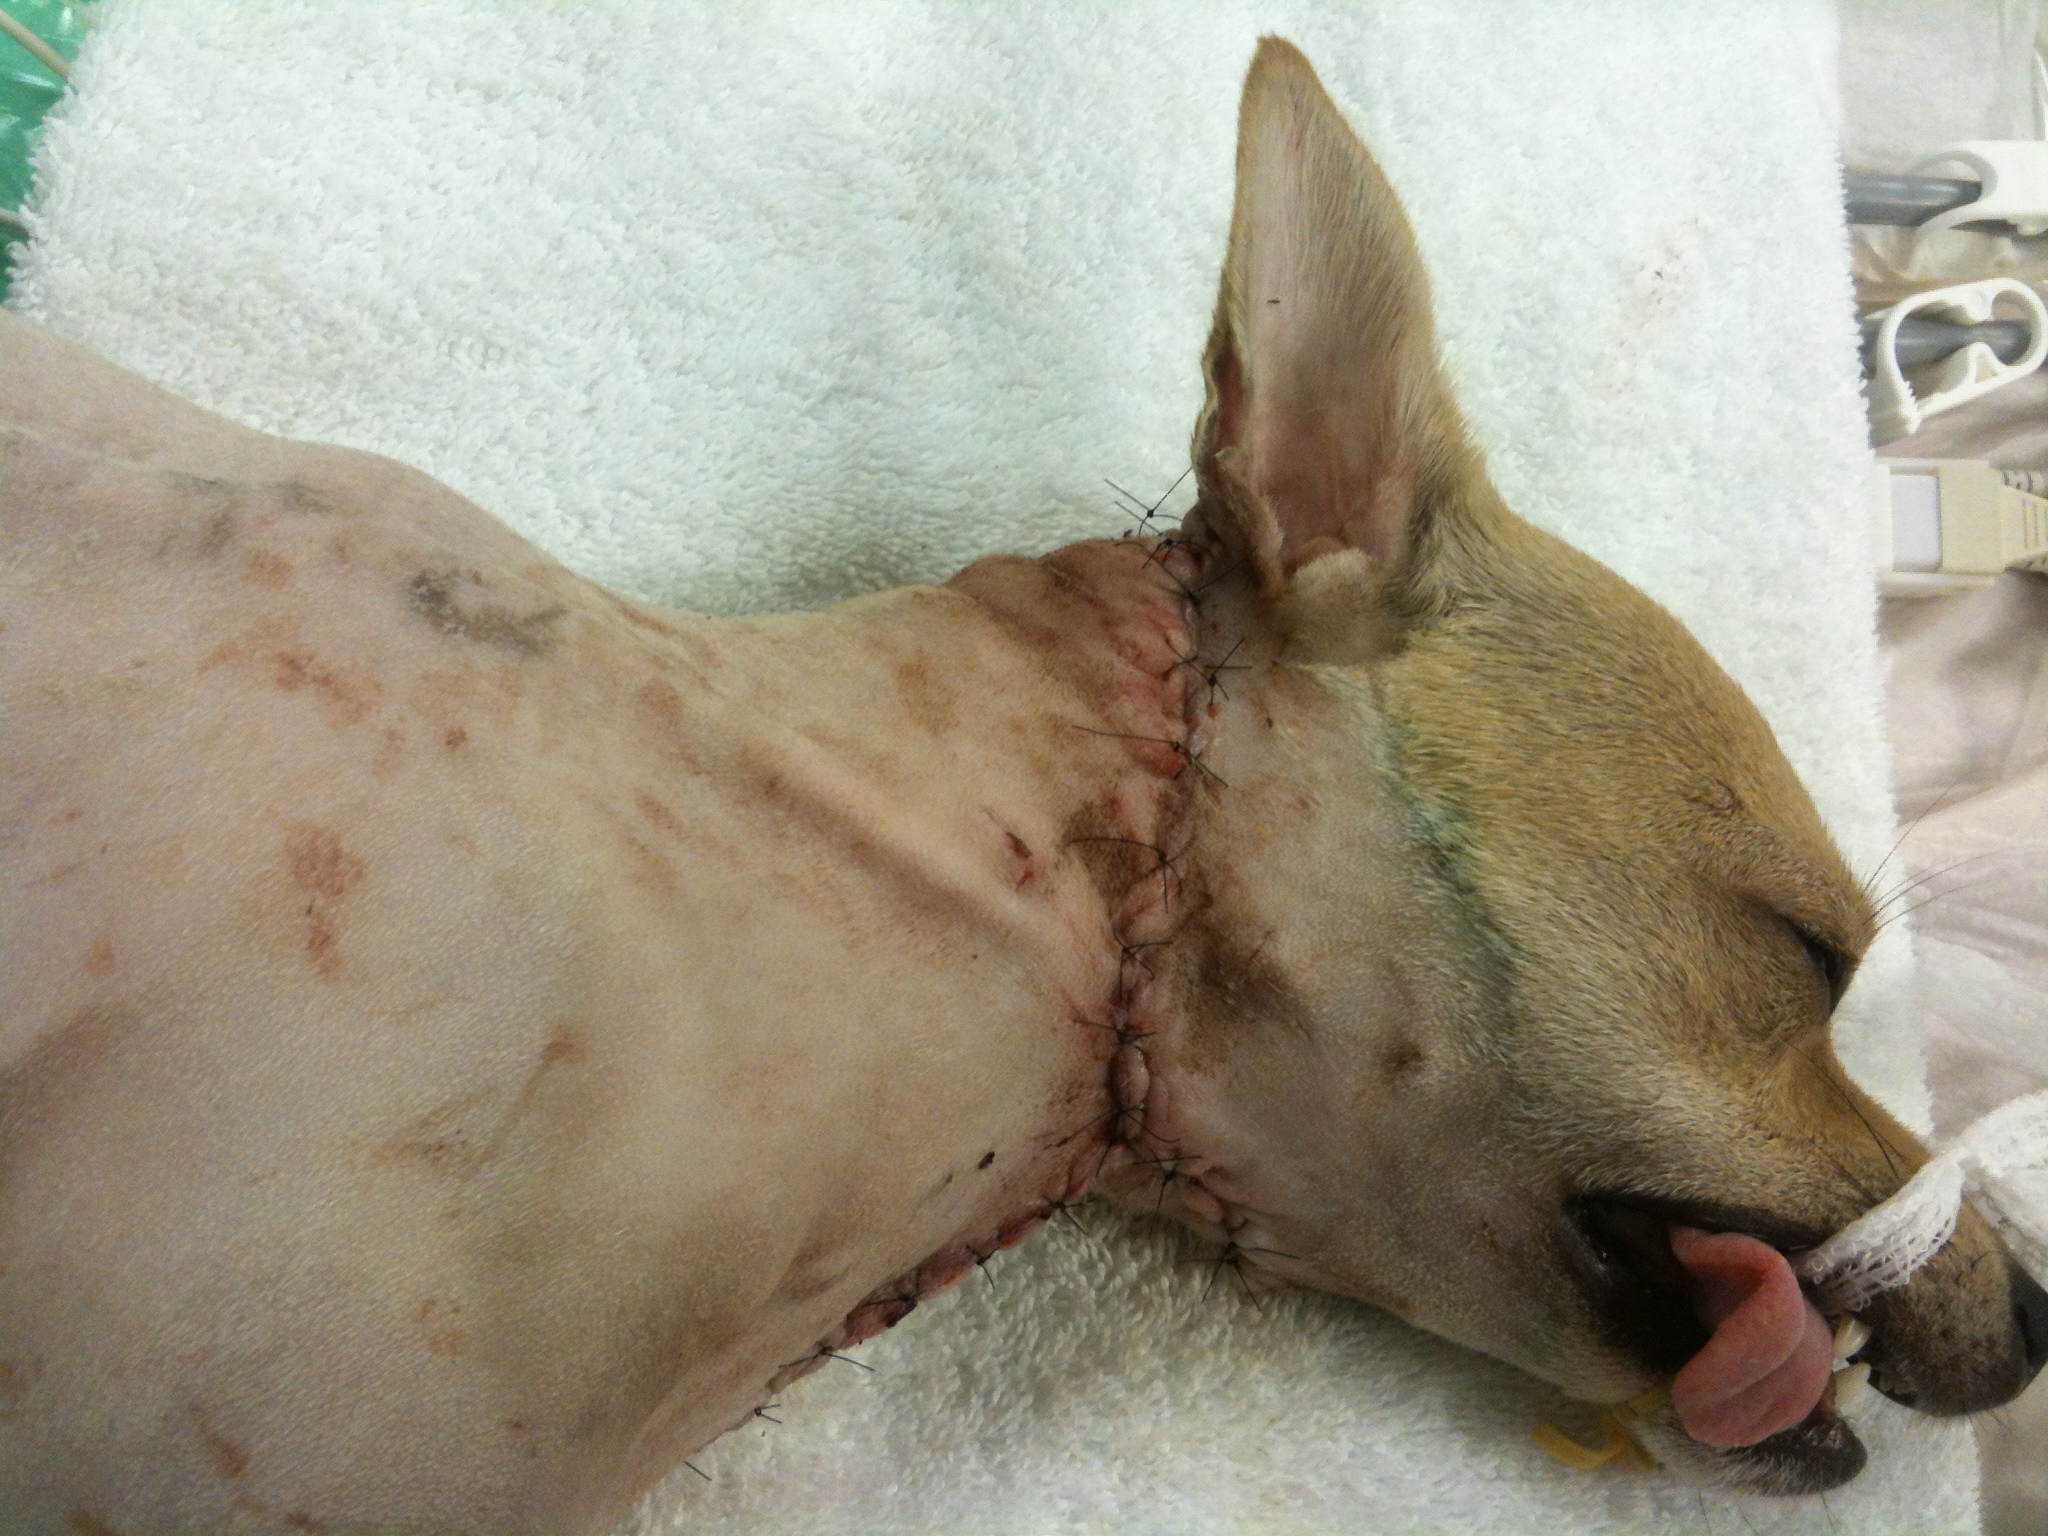
Advancement flap
Following surgery we also utilized laser therapy to help promote uptake of the skin flap. This is Lucky in his referee uniform (it is close to Halloween) receiving his laser therapy.
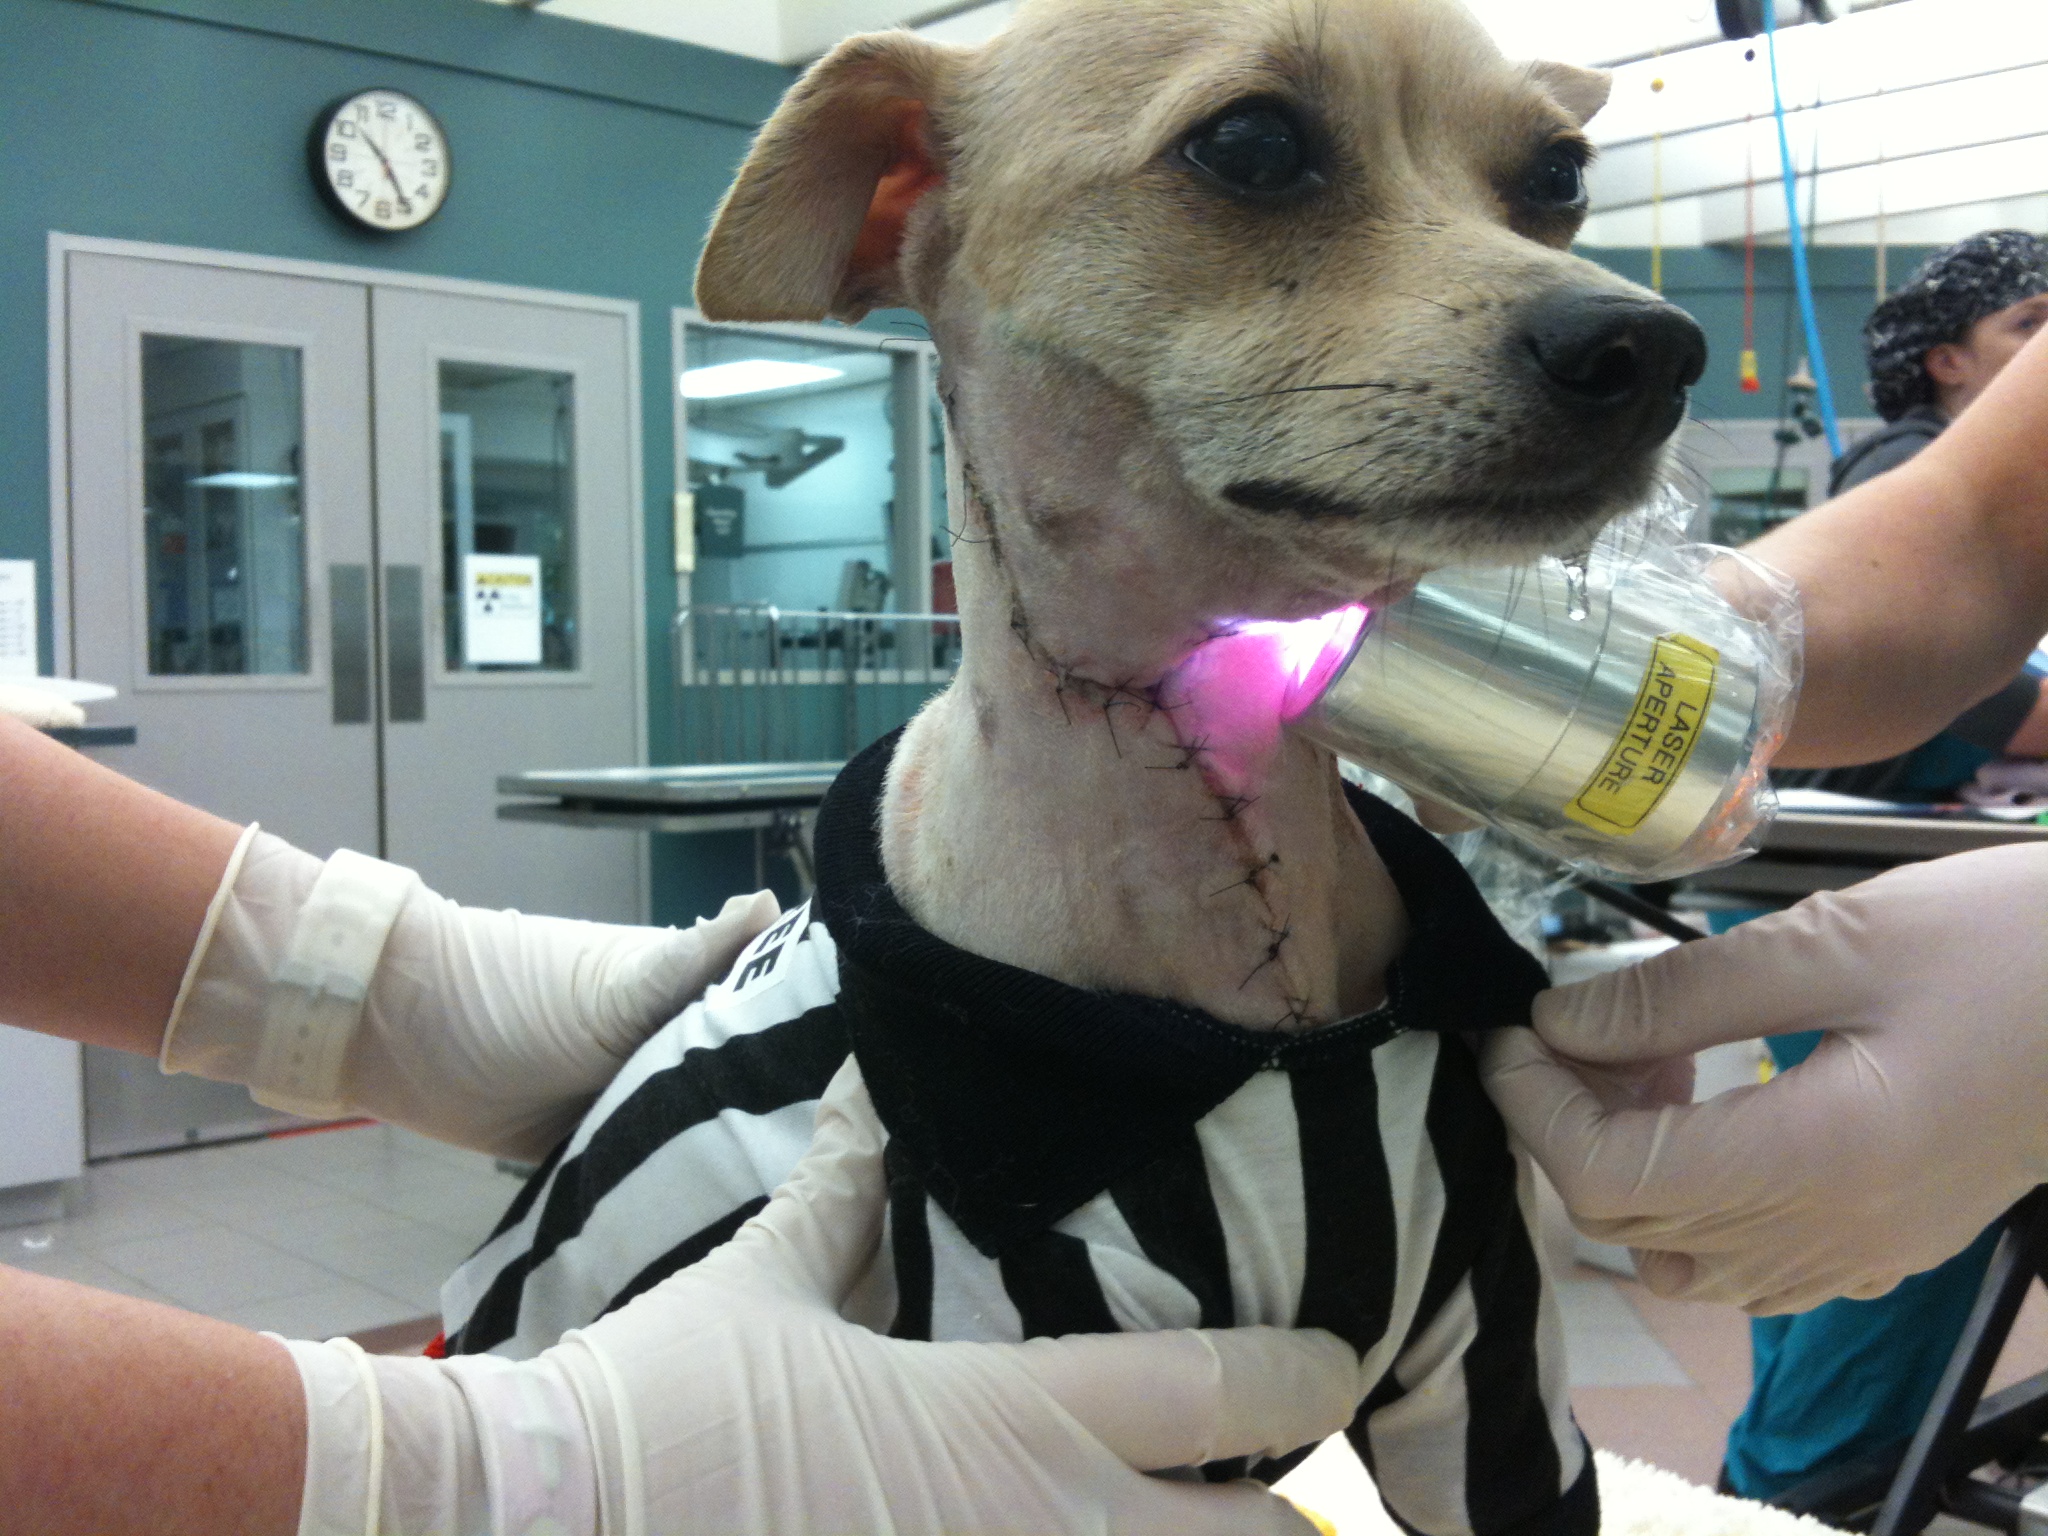
Post-advancement flap therapy
Here is the finished product for Lucky!!! He overcame a lot of obstacles along the way!!
This is about 6 weeks after Lucky presented.